DIY stir plate for homebrew yeast starters
December 3, 2015
I brew beer as a hobby, and one of the secrets to really good homebrew is happy, healthy, plentiful yeast at the start of fermentation. Creating a yeast starter really helps with this, and a good yeast starter requires a stir plate to keep the yeast in suspension.
Stir plates aren’t super expensive, but at around 100USD they’re not something you’d buy on a whim. I found a lot of information online on how to make your own DIY stir plate using an old computer fan and some magnets, and since I also like tinkering with electronics I decided to give it a go. After a couple of design iterations I’m really happy with how this project turned out.
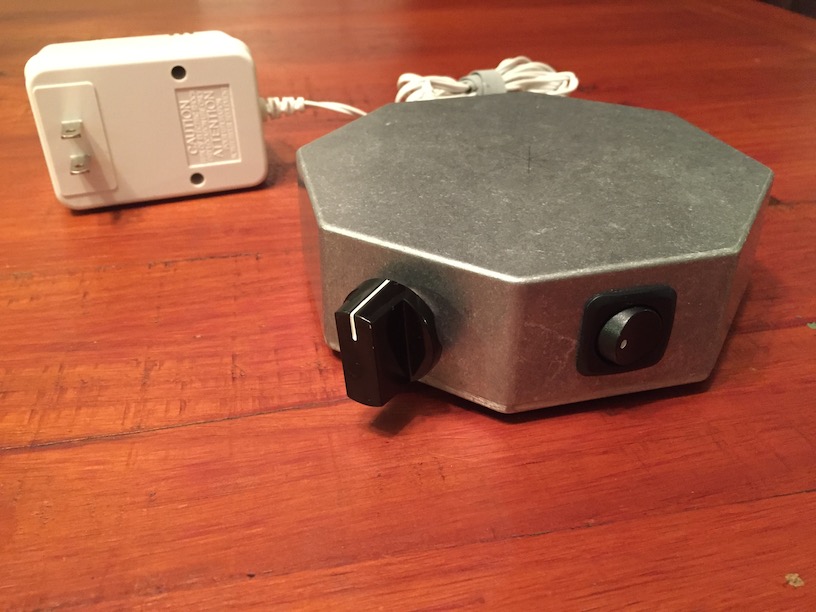
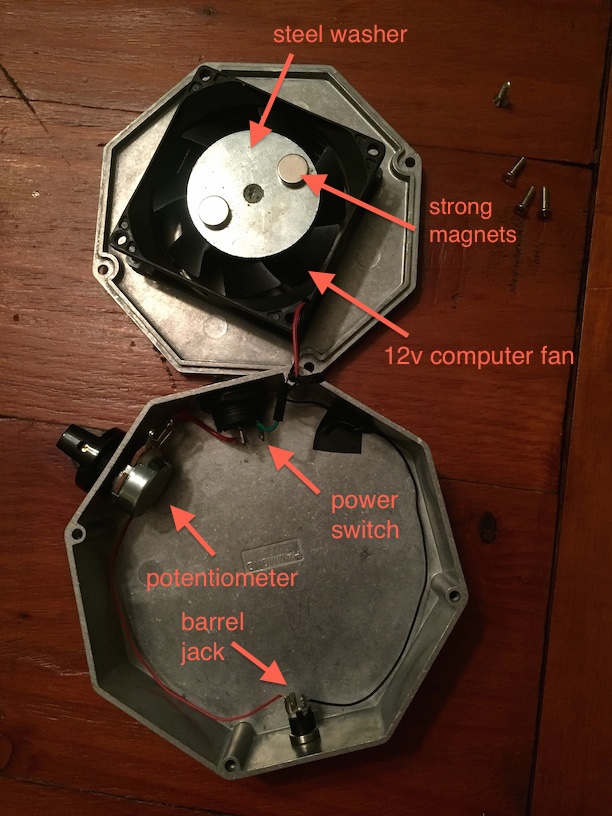
The internals
This is a pretty simple piece of electronics. In terms of components we have:
- a $10 aluminum project box
- a 12 volt computer fan (sometimes called a muffin fan) liberated from an old computer
- a 9 volt DC power supply which I scavenged from somewhere (note NOT 12V, which would spin the fan too fast for our purposes)
- a $3 panel mount barrel jack for the power supply
- a panel mount 25 ohm potentiometer, plus knob (maybe $2?) to act as a voltage divider to control the fan’s speed
- a $0.50 panel mount switch for a power switch
- a steel washer which I hot-glued to the computer fan
- two rare-earth magnets ($4 for 6), which are stuck to that washer just with magnetism.
- a few strands of wire to build our simple circuit
Note that a lot of the project writeups I found online were using magnets salvaged from an old computer disk drive. If you’ve got one of those lying around and have always wondered what the inside looks like then go ahead and salvage them. Initially I did this myself, but ended up going with the ones I bought for $4 since they seemed to work better for my setup.
here’s a circuit diagram showing how the electronics are assembled.
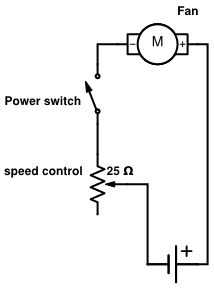
Pretty simple, which is good for me since I’m not an electronics whiz. I have read in another guide that it’s not a good idea to use just a simple pot-based voltage divider to adjust the speed since it will be pulling a lot of wattage when the speed is turned down. However with my current configuration I usually leave the stir plate at pretty much full blast anyway with a 9V supply, so I’m not too worried.
Building it
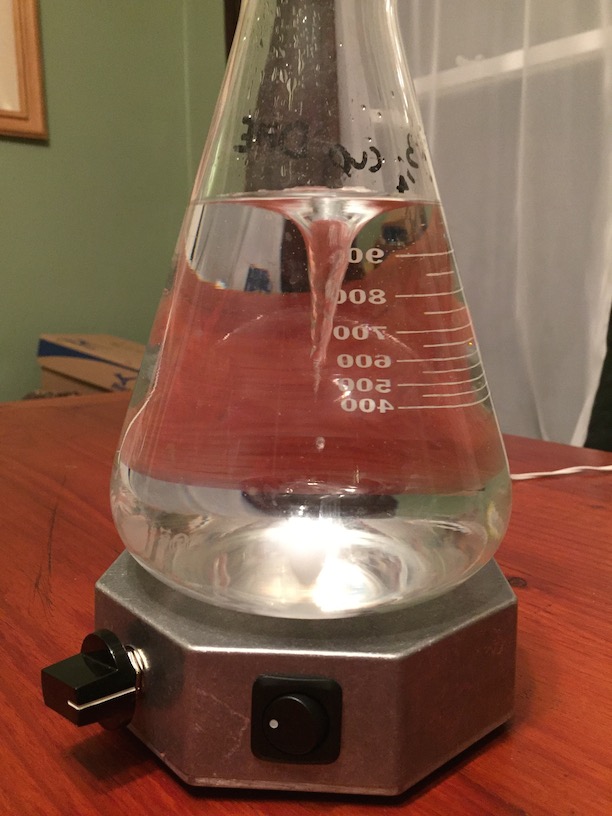
I hot-glued a steel washer to the computer fan, then attached the two magnets about 1" apart. Next I did a dry-run assembly of the circuit and tested that the fan spun and I could control speed with the potentiometer. Next I put the fan in the project box and tested that it was able to spin a small magnetic stir bar inside my Erlenmeyer flask filled with water.
Positioning the magnets
Getting the magnets placed correctly is probably the most tricky part of this. First off, it’s important to make sure that you place the magnets with opposing polarities. In other words, one with the north pole pointing up, the other with the south pole pointing up. You’ll know if you get this wrong because the stir plate will “throw” the stir bar when it’s running. I also had to play with the distance between the magnets, the size of the stir bar (I also had a 2" bar which tended to get thrown), and most importantly the distance between the base of the flask and the top of the magnets. You can probably reduce the distance by putting some sort of spacer under the fan, or under the magnets. You can perhaps increase the distance by putting something like these these stick-on grippy dots on the surface that the flask sits on to raise it a little higher. Finally, you could experiment with adding more magnets, either stacked or in placed at 12, 3, 6, and 9 o’clock. I did briefly try stacking a second pair of magnets in an attempt to allow the stir bar to spin EVEN FASTER!!!!! without throwing but it actually had the opposite effect. A lot of these adjustments were counterintuitive, so I’d suggest just playing around until you find something that works. Finally, do make sure you test the setup with a stir bar in the flask you’ll use, with liquid in there.
Once I had figured all that out and had a fully functional setup I started assembling the stir plate for real. I started off by attaching the computer fan to the base of the project box with a square of foam mounting tape. Then I drilled holes in the aluminum project box for my panel-mount power switch, potentiometer and barrel jack. I used a small drill bit to make a pilot hole followed by a step drill bit to widen the hole. Once I had all the components in place I just needed to solder a few wires and the project was pretty much complete.
For a final touch I added some clear grippy plastic bumpers to the base of the box to help reduce vibration noise when the stir plate is running.

All in all this probably took me 4 hours of time, spread over a couple of weekends. I’m really very happy with the result. It works well and it actually looks like a professional job, something that’s very rare for things I make with my own hands! It even got a seal of approval from my Junior Homebrewer friend.
